
There's no FDIC insurance in the crypto world. Always do the work and test before sending any funds. You need a special type of wallet, a cryptocurrency wallet, with which you can purchase, trade, sell, and transfer digital assets on a blockchain.
If you want to keep your cryptocurrency safe, you'll need a bitcoin hardware wallet.
MetaMask is maybe the most well-known cryptocurrency wallet. Its appeal stems in part from its compatibility with virtually all Ethereum-based platforms, as well as its ability to link to over 3,700 decentralized apps, or dApps, and Web3 services. It may be used as a hot wallet (always connected to the Internet) or a cold wallet (attached to hardware wallets such as Trezor or Ledger).
Consider the MetaMask wallet to be your entry point to everything Ethereum. Sushiswap allows you to buy Ethereum-based currencies like Apecoin or into liquidity pools like $Primate-$APE. You may also connect MetaMask to platforms like Opensea or LooksRare to buy NFTs.
MetaMask is available for iOS and Android devices, as well as as a browser plugin for popular browsers including Chrome, Firefox, Brave, and Edge.

How do I set up MetaMask?
To begin, simply install MetaMask as a browser plugin. The simplest method is to visit to MetaMask.io and select Download using one of the supported browsers listed above. In this example, I'll open Edge and navigate to MetaMask, then click Download and Install.

It will take you to the Edge Add-Ons website. To install and add the extension, click Get.

The extension has been installed in your browser.

Continue by selecting the MetaMask extension and clicking the Get Started button.

Next, choose Create a Wallet. This will generate our hot wallet, which will be always linked to the internet and accessible.

To proceed, agree to the Terms of Service and establish an eight-character alphanumeric strong password.

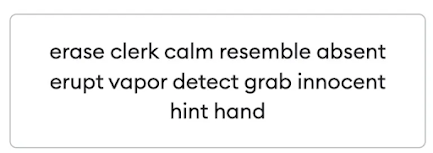
To reveal your hidden recovery phase, click Create and Next.
***
I'd want to take a moment to emphasize the importance of safeguarding your secret recovery phrase, also known as your seed phrase. It's the same as handing out your debit card and PIN details. You would never do something like this. Someone can have your debit card, but they won't be able to use it until they know your PIN number. And, much as someone who knows your PIN, someone who knows about your secret recovery phase may import your wallet, rendering your password meaningless. To be more specific:
Never, ever, ever divulge your secret recovery phase to anybody.
It should never be typed in an email.
Never give it to a caregiver.
Never put it online.
Never — EVER — use it unless you're reinstalling MetaMask, and even then, always go to MetaMask.io.
Once you understand the significance of safeguarding this secret recovery phrase, click the button below to expose it.

Make a note of it and keep it somewhere safe. I'll disclose it for the sake of this post, but never do so while making an actual wallet.

Click Confirm, and you're done. You've made a MetaMask wallet.
Let's take a short look at the user interface to make sure you know what you're looking at. Navigate to the MetaMask extension.

The MetaMask wallet displays, and you can see your address, which will be used to hold your cash.

You may alter the name of your wallet by clicking the three dots and Account Details. I prefer to refer to it as "Hot." Your QR code and ETH address are also visible. This will be used when sending money to your wallet. Consider it a home address.

You may also copy your address to the clipboard to save it for later use when transferring payments from an exchange like Coinbase, Crypto.com, or Binance.US.
We need to erase the entire extension and restore it using your secret recovery phrase as a test now that you have a basic knowledge of the UI. Before doing this, I don't like to send any money to a wallet. Nothing is more frustrating than attempting to recover a wallet and failing. As your Crypto Coach, I always advise you to conduct your homework and test before transmitting any cash. In the crypto realm, there is no FDIC insurance. Prepare ahead of time to defend yourself.
Simply uninstall and reinstall the extension as mentioned above to verify the restoration procedure. After selecting Get Started, select Import Wallet rather than Create Wallet.
Enter your safe secret phrase and password, then click Import to finish.


Click the Connect button. Your wallet is now linked to Opensea, and if you have funds in your wallet, you may explore and purchase NFTs.
As a wise practice, disconnect from Opensea or other sites when you are not using them. It takes extra procedures, but it can protect you from any Opensea exploits.
Simply choose Connected Sites and click the three dots to disconnect Opensea.

This procedure applies to linking your MetaMask wallet to any site. Just remember to unplug after you're finished. Please disconnect from the internet.

How do I include custom tokens into MetaMask?
If you need to add special tokens to MetaMask, such as Apecoin or USD Coin (a stablecoin tied to the US dollar), simply go to CoinGecko or CoinMarketCap and search for the coin.

When you discover the coin, click the MetaMask icon to launch MetaMask.

When you click Add Token, your new token will show in the list. I repeated the procedure in this example, adding USDC, SUSHI, PRIMATE, and USDT.

How can I set up a hardware wallet using MetaMask?
The final section of our article will show you how to link a hardware wallet to MetaMask. If you have a Trezor, for example, you can connect it to MetaMask and have both a cold and a hot wallet. Let's go over the steps. Connect your Trezor to your computer using the USB-C cable. Once linked, launch MetaMask, choose the Profile icon (circle) on the far right, and then click Connect Hardware Wallet.

Choose the appropriate hardware wallet, in this example Trezor.

.Continue by connecting Trezor. To connect, simply follow the directions.

You now have a hot wallet as well as a cold wallet. (I rename them "Hot" and "Cold," but you may call them whatever you like.)
What are some recommended practices for MetaMask use?
Let's take a look at some best practices. I make all of my purchases with my hot wallet. If I wish to buy one Ethereum token, for example, I transfer the money to my Hot Wallet. I buy Ethereum, and if I intend to retain it for a long time, I move it to my Cold wallet for safety. I never give anyone access to my hardware (cold) wallet. To prevent a hacker from accessing my cold wallet, I always unplug my hardware wallet while not in use, as demonstrated previously in this piece.
Furthermore, if I'm going to buy an NFT, I send cash to my hot wallet, buy the NFT, and then utilize Opensea's transfer option to move it to my cold wallet for safety. I never show people my cold wallet or any of my valuables. This is also useful if you are fooled into hitting a bogus link in order to claim or acquire an NFT. If you visit a malicious link (but merely expose your hot wallet), you may rest certain that you have not exposed your full assets to an exploit.
In this case, topshotkief.eth visited a rogue website, clicked a link to claim a goblin NFT, and authorized a smart contract that erased topshotkief.eth's assets. Topshotkief would have only lost what was saved on its hot wallet if he had adopted my way; his NFT collection would have been safe and undisturbed in his hardware wallet. Never, ever, ever link your hardware wallet to any site that exposes your assets. To make all purchases, use MetaMask's hot wallet.
I hope this has helped you better grasp MetaMask. In subsequent articles, we will expand on this information by delving into liquidity pools and other areas.
===
All Images culled from Google Image search.


0 Comments